
1. Obtain API credentials from Solidgate
Navigate to Developers → Channel details page in your Solidgate account:
https://docs.solidgate.com/payments/integrate/access-to-api/#retrieve-your-credentials
You will need to obtain the following keys:
- API keys with the prefix apipk / apisk
- Webhook keys with the prefix whpk / whsk
2. Add credentials to web2wave Project settings
In web2wave Project settings → Payments → Solidgate, fill in all fields:
- Public API key (api_pk_xxxxx)
- Secret API key (api_sk_xxxxx)
- Public Webhook key (wh_pk_xxxxx)
- Secret Webhook key (wh_sk_xxxxx)
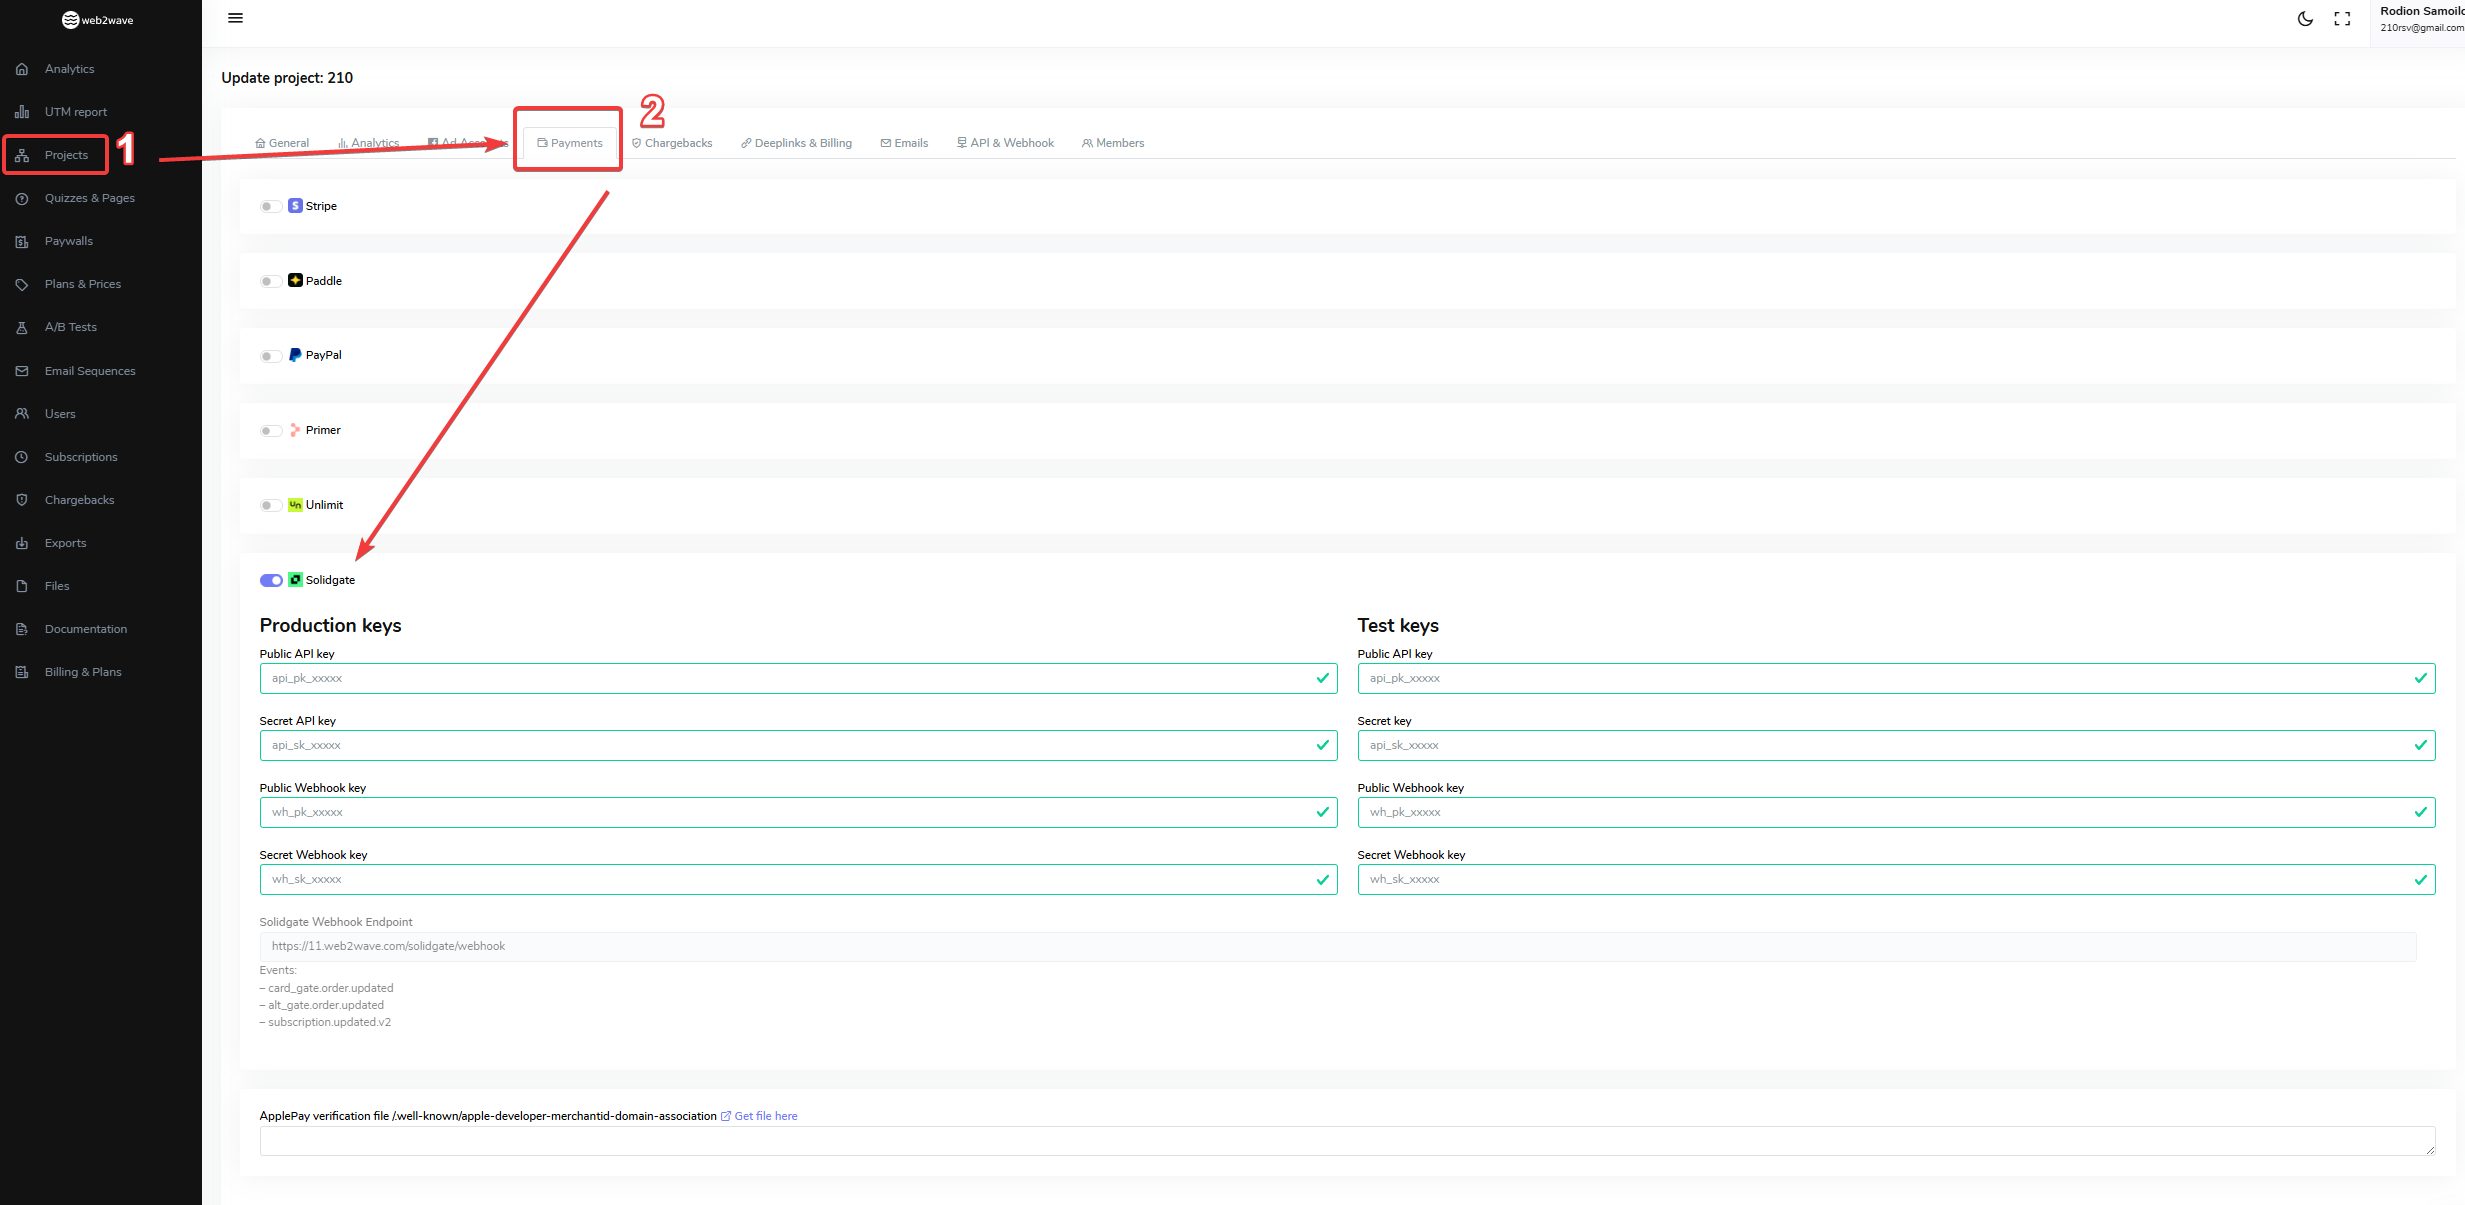
web2wave Payments tab, Solidgate integration
3. Configure webhook URL (if required during key retrieval)
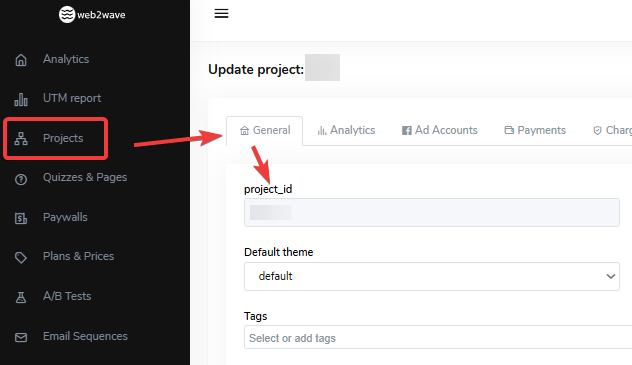
If Solidgate asks for a webhook URL when obtaining the whpk / whsk keys, use this format:
https://PROJECT_ID.web2wave.com/solidgate/webhookReplace PROJECT_ID with your actual project ID value from the project_id field.
Webhook events to enable:
- card_gate.order.updated
- alt_gate.order.updated
- subscription.updated.v2
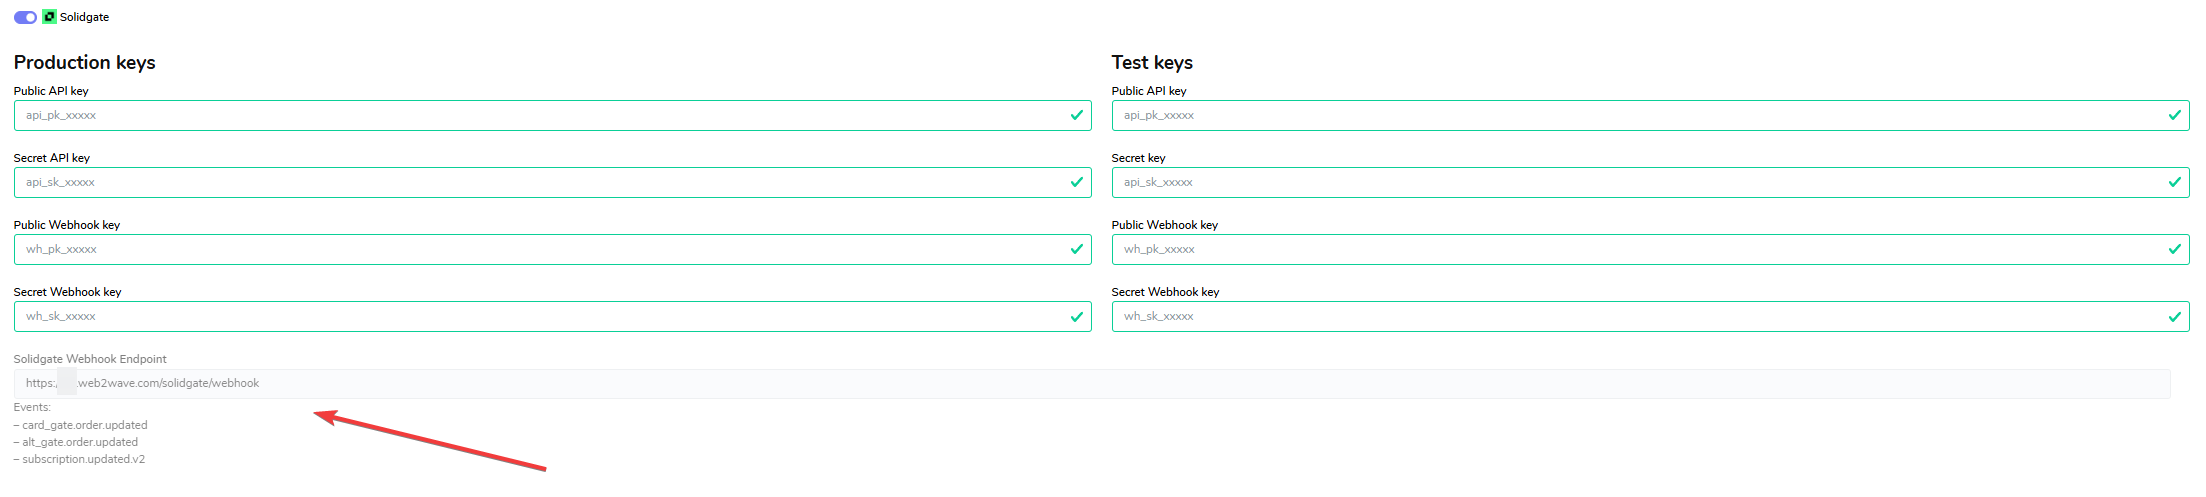
You can copy your webhook URL from this field
Note: In the Solidgate panel, these events may have slightly different user-friendly names. Select the corresponding events. After saving all keys in your web2wave project settings, the webhook will auto-update with the correct event subscriptions.4. Save settings
Click Save in web2wave Project settings. The webhook will be created automatically, and Solidgate integration will be ready to use.
5. Configure and enable Google Pay button (optional)
To enable Google Pay for the Solidgate integration, follow these steps:
Go to: Projects → select the required project → Edit → Payments → Solidgate and scroll down to the Google Pay section.
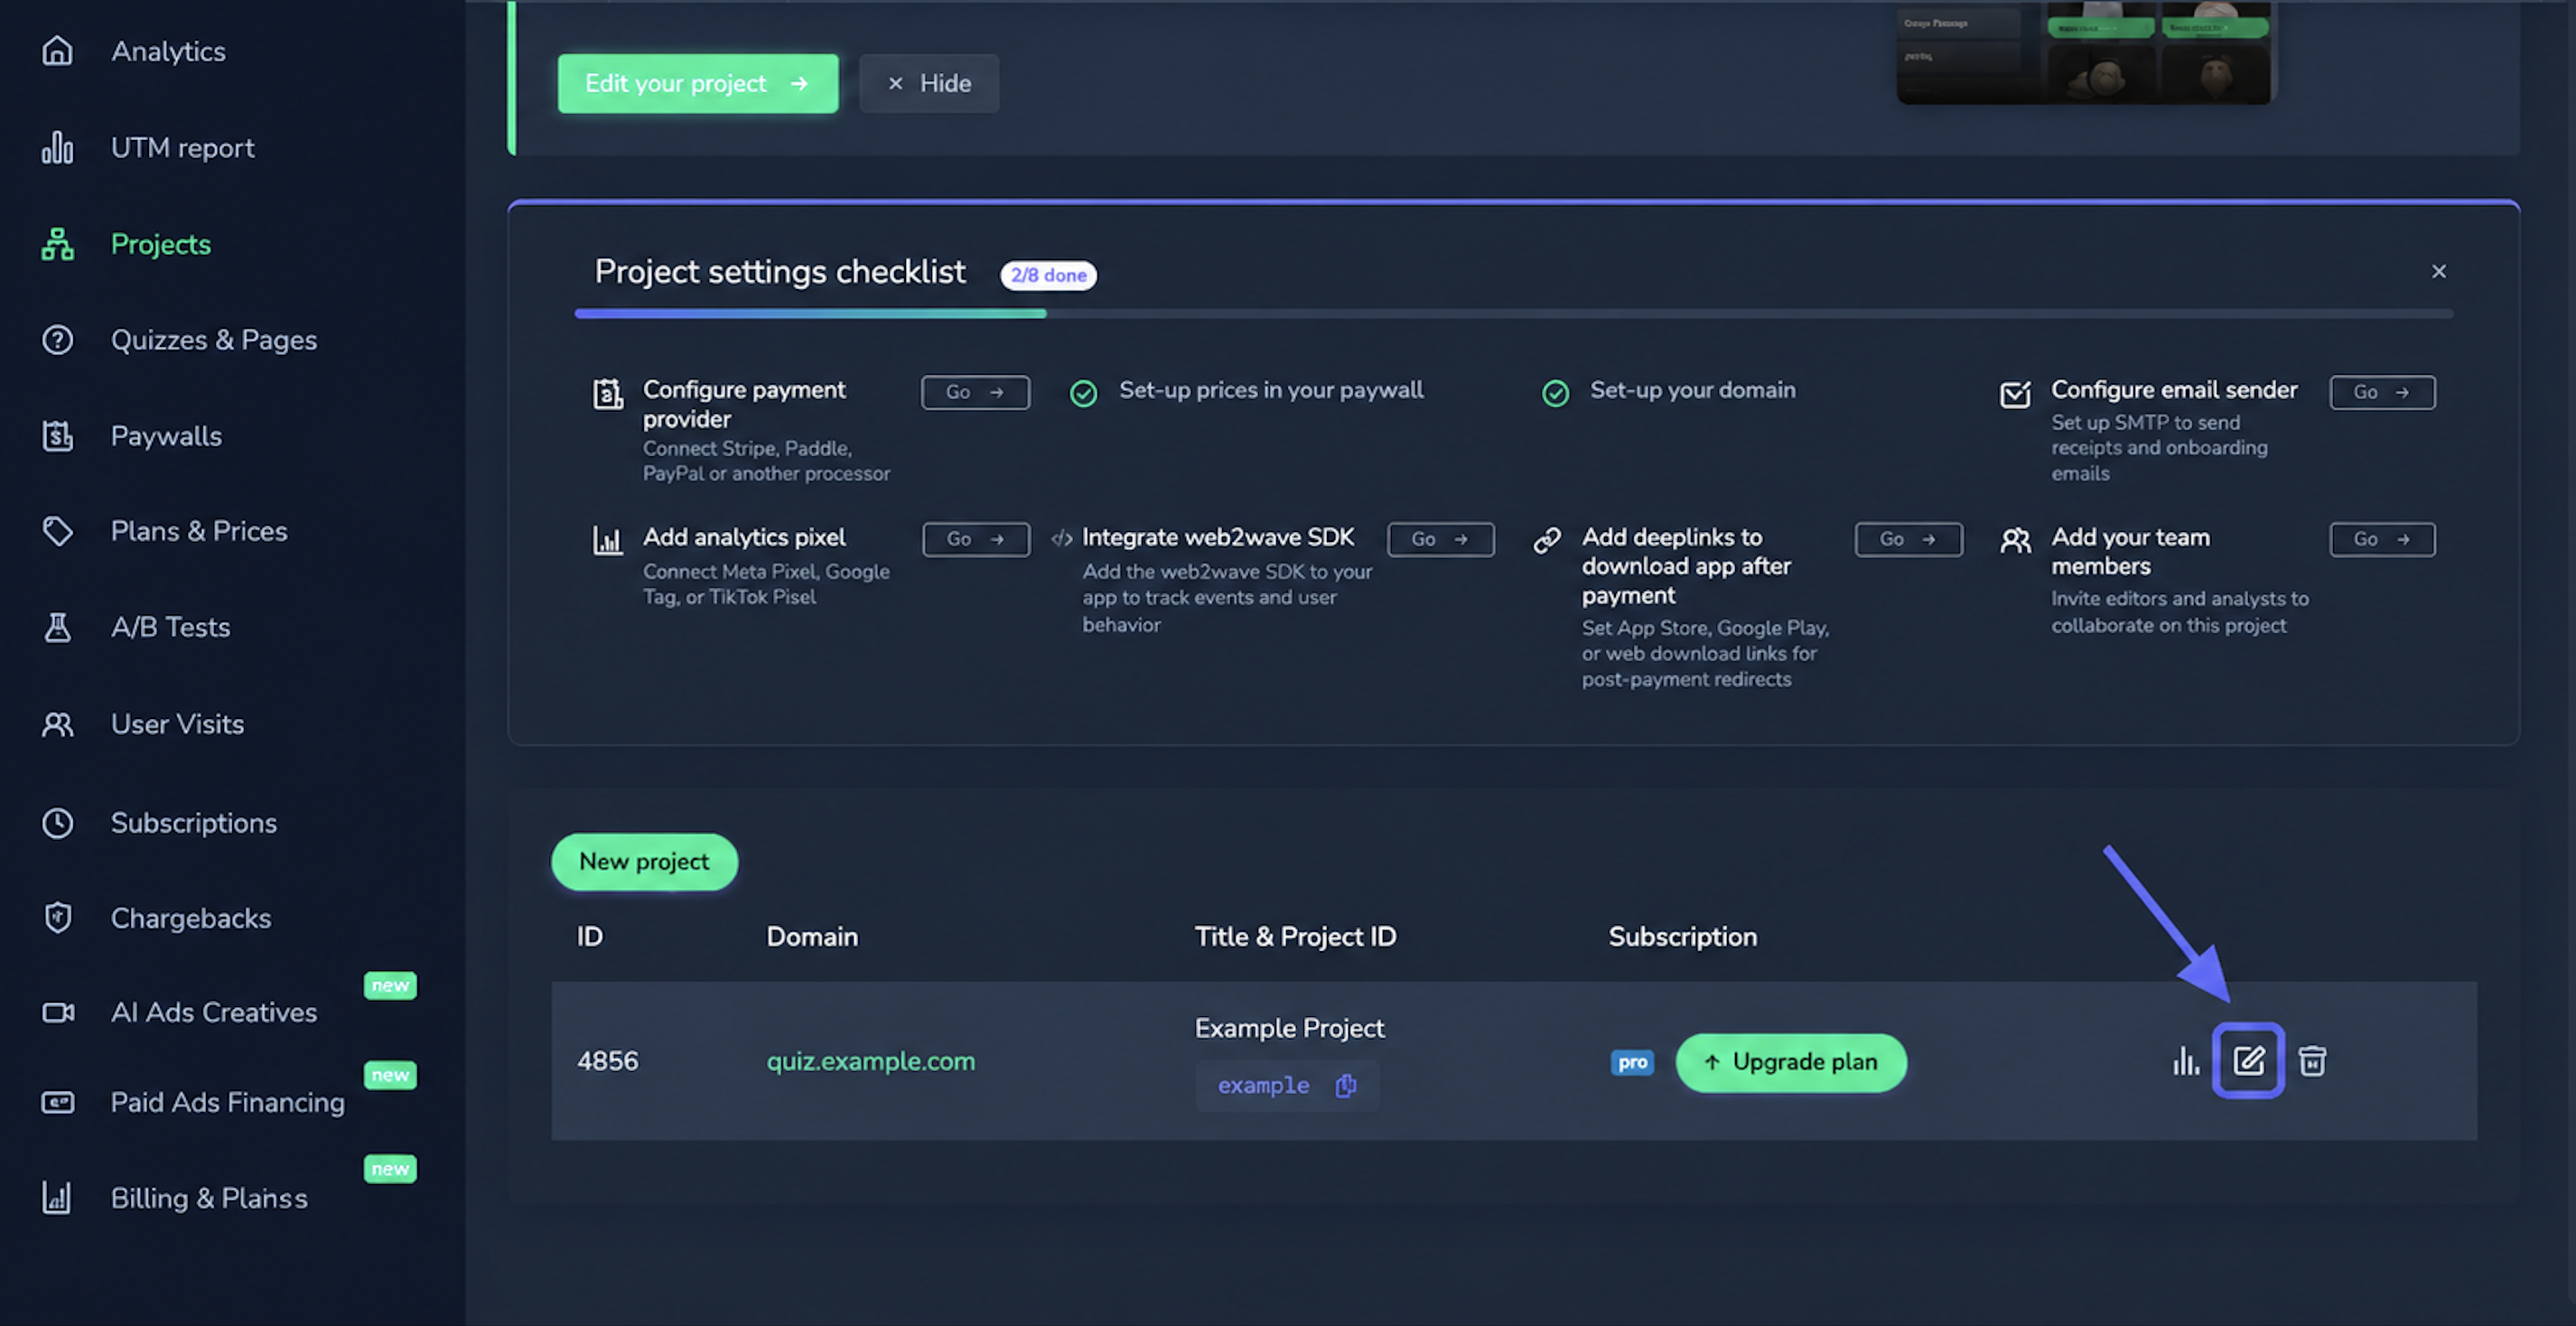
Add Google Pay merchant details
Fill in the following fields:
- Google Pay Merchant ID — enter the Merchant ID from your Google Pay & Wallet Console.
- Google Pay Merchant Name — enter the merchant name that should be displayed to customers in the Google Pay payment sheet.
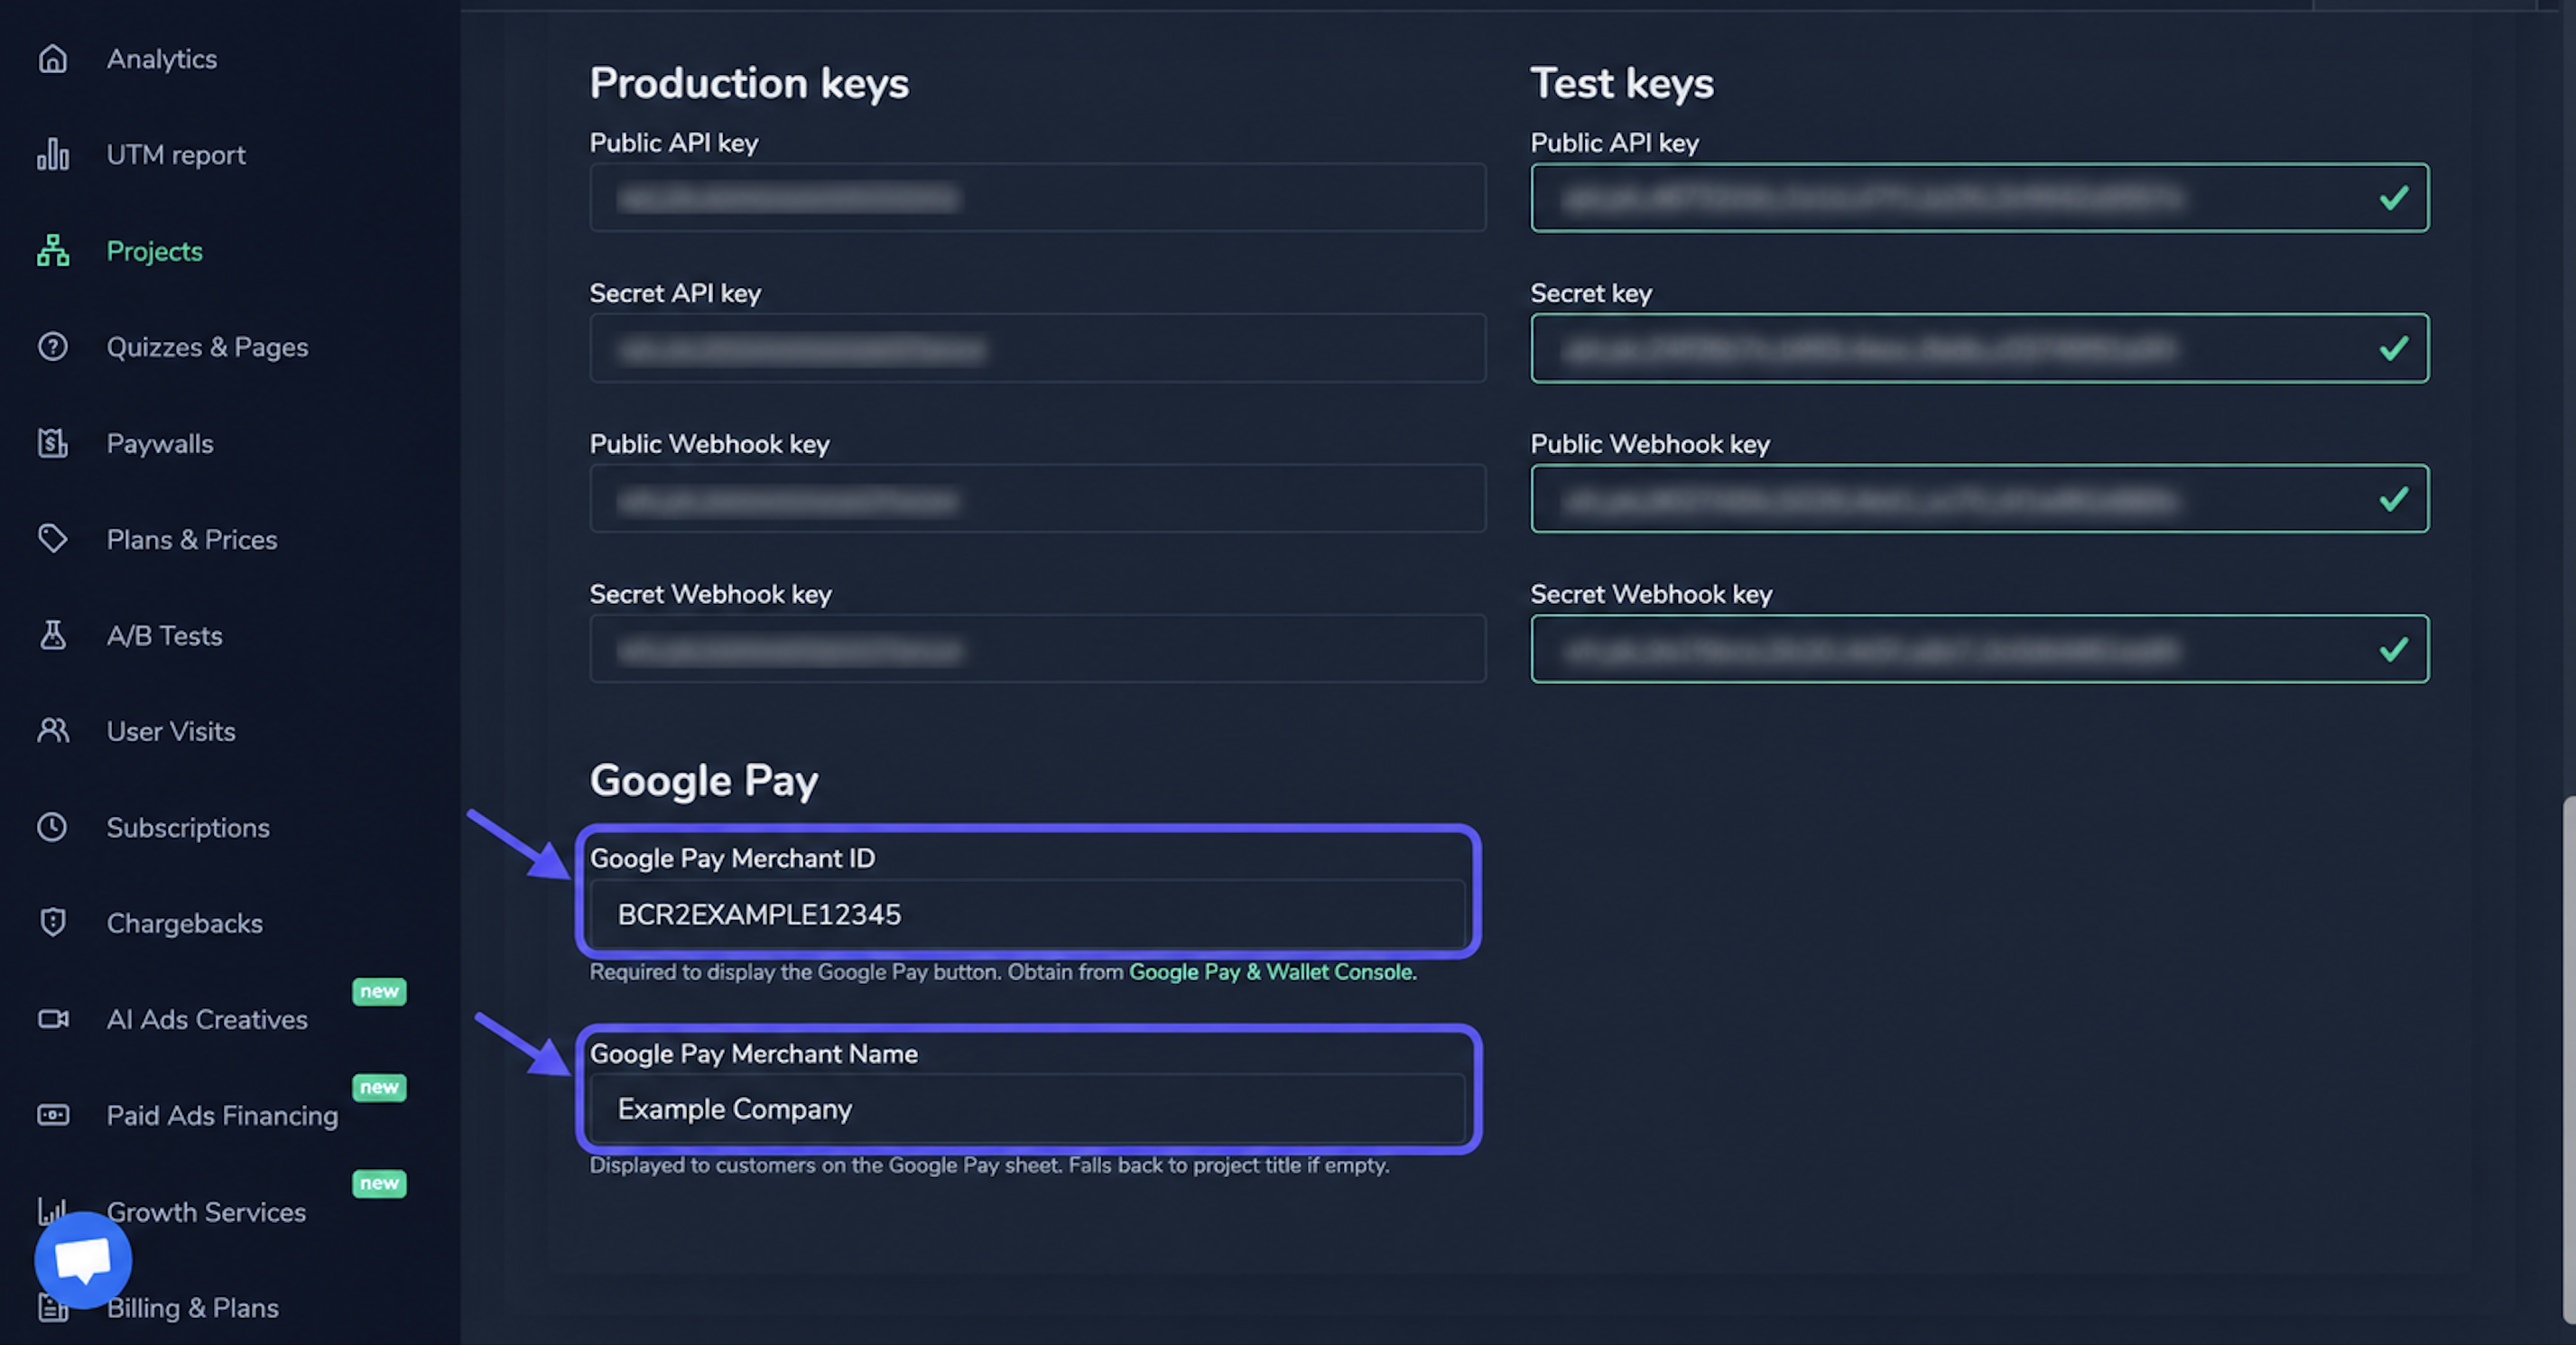
Important: Before configuring Google Pay in web2wave, the project domain must be integrated and approved in Google Pay & Wallet Console. Google Pay will work correctly only after the web integration for the domain has been approved by Google.
Configure Google Pay button in the Solidgate Checkout Form
Add the required CSS
Go to: Paywalls → select the required Paywall → Editor → Сheckout (make sure to select the checkout screen, not the paywall screen, as this is where the Solidgate Checkout Form is located).
Then go to:
Edit styles → Custom CSS
Scroll to the bottom of the existing CSS. Do not delete or replace any existing code. Add the CSS from the following guide at the end:
Web2Wave — Solidgate Form Styling
This CSS ensures the correct display and styling of the Google Pay and Apple Pay buttons in the Solidgate Checkout Form.
After completing the setup, click Save → Save & publish.
6. Apple Pay button (optional)
To add the Apple Pay button through the Solidgate payment form, verify your domain in the Solidgate panel:
https://docs.solidgate.com/payments/integrate/payment-form/apple-pay-button
The domain verification file is uploaded by default on the web2wave side.
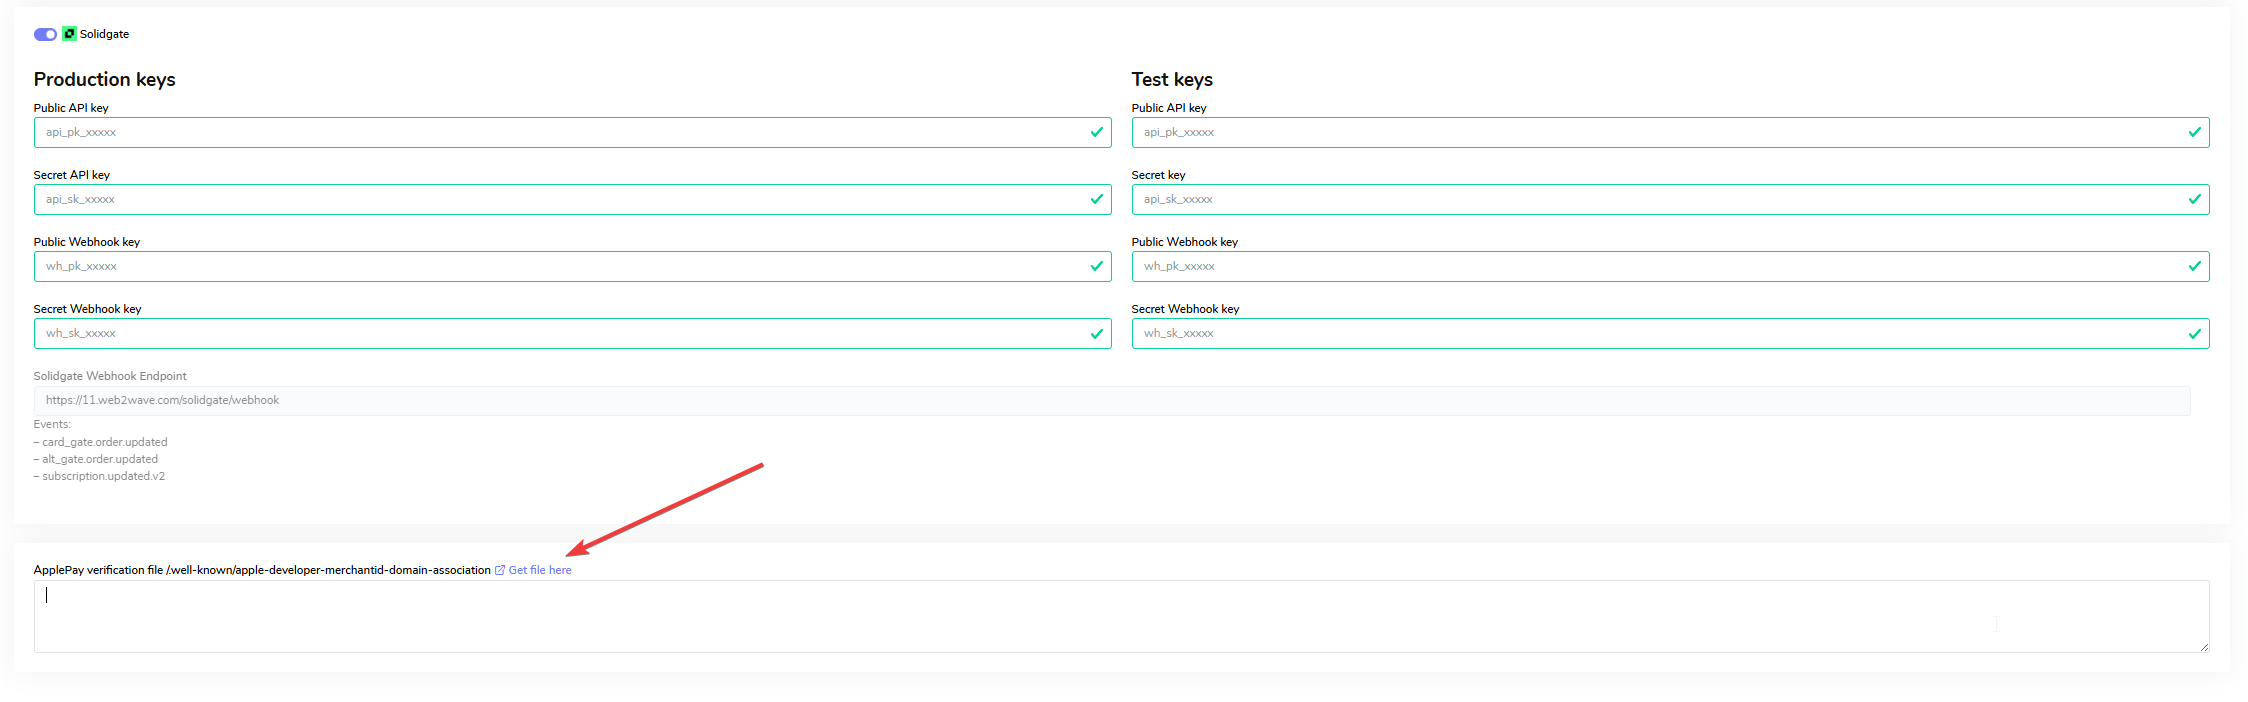
Upload file's text in this field and Save changes
Once you confirm the domain in Solidgate's panel, the Apple Pay button will appear automatically on the payment form.
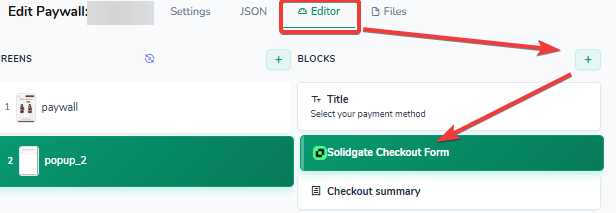
Enable the Apple Pay button
On the same checkout screen, select:
Solidgate Checkout Form → Block Properties → Form Options
Enable:
Displaying the Apple Pay button in any browser
After completing the setup, click Save → Save & publish.