
Configure what happens when a Stripe payment fails - show error messages, redirect users, open error popups, or log analytics events.
Part 1. Adding Payment Failed Actions rule
- Log into your web2wave account and open the paywall that contains your Stripe payment form. In the Screens panel on the left, click the popup screen that contains your payment form to open it in the editor.
- In the Blocks panel, select either of the two blocks that support Payment Failed Actions rule:
- Stripe Checkout Form
- Stripe Wallets Express
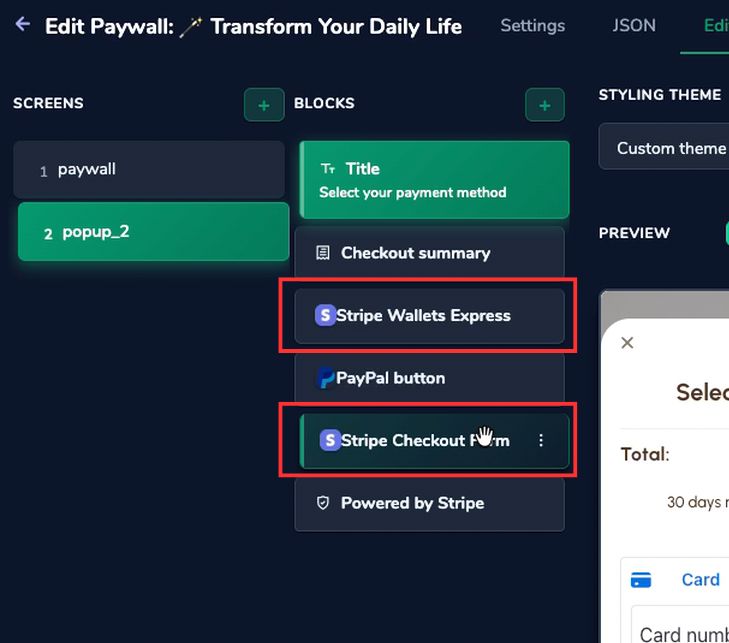
- The Block Properties panel on the right will update to show the selected block's settings. Scroll down in the Block Properties panel until you see the Payment Failed Actions section. Click the + button next to the section header to create your first rule. A rule form labeled #1 appears.
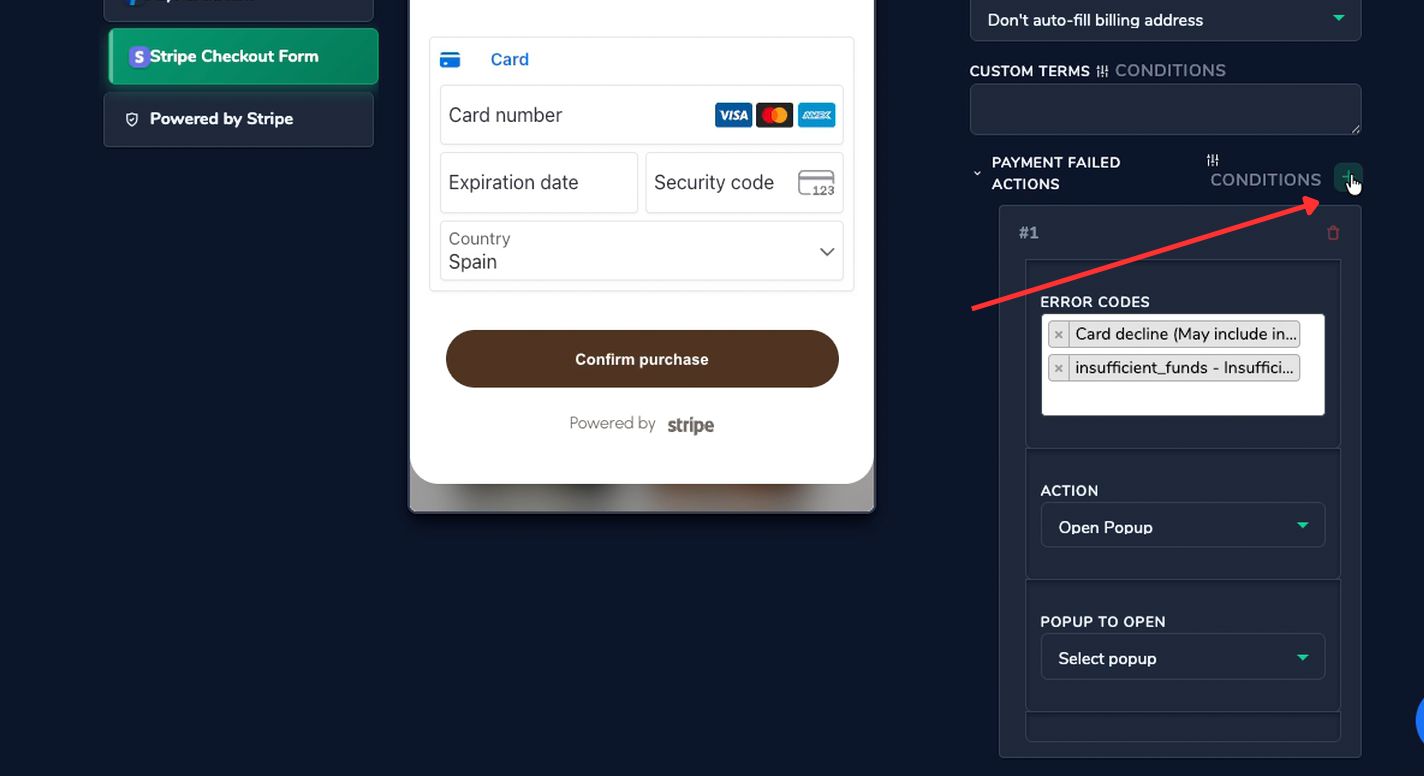
The Conditions button next to the section header lets you add conditional logic so a rule only activates under certain circumstances.
Learn more: Conditional Logic for Fields and Screens
Part 2. Configure the Rule
Each rule has two mandatory fields: Error Codes and Action.
Error Codes
- Click the Error Codes dropdown menu to choose which Stripe error(s) trigger this rule.
- You can select one, multiple, or all available error codes.
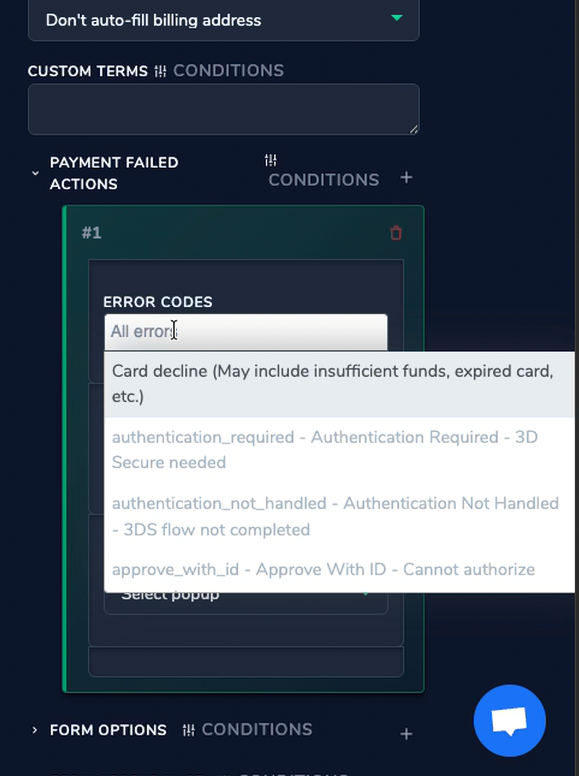
To respond differently to different failure types, configure rule #1 for one set of codes, then click + to add rule #2 with a different set of codes and a different action. You can create as many rules as needed.
Full list of available error codes: Payment Errors
Action
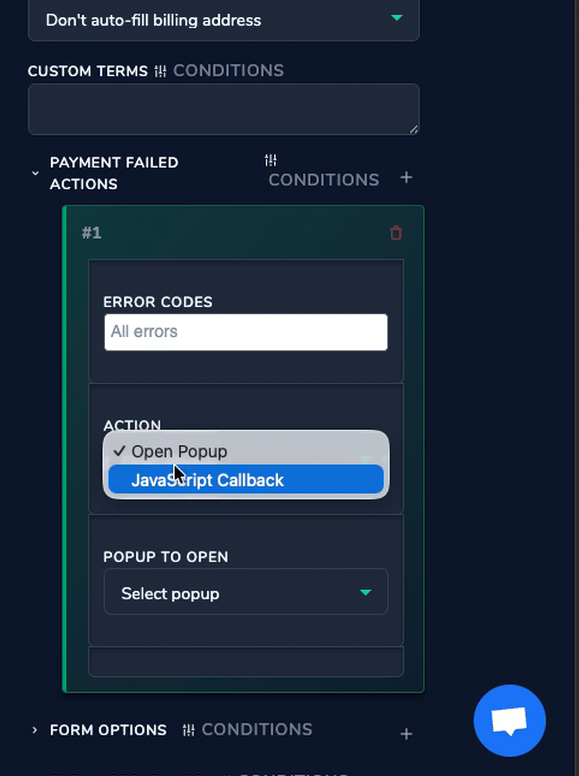
Click the Action dropdown to choose between two available options:
- Option A - JavaScript Callback: Runs custom JavaScript code when the error fires. A JavaScript Callback text field appears below the Action dropdown.
- Option B — Open Popup: Opens a different paywall popup screen[cite: 26]. A Popup to Open dropdown appears - select the target screen from the list.
Part 3A. JavaScript Callback - Code Examples
Enter any valid JavaScript in the JavaScript Callback field. The platform validates the code in real time - a red JS error: Unexpected token message appears if there is a syntax error.
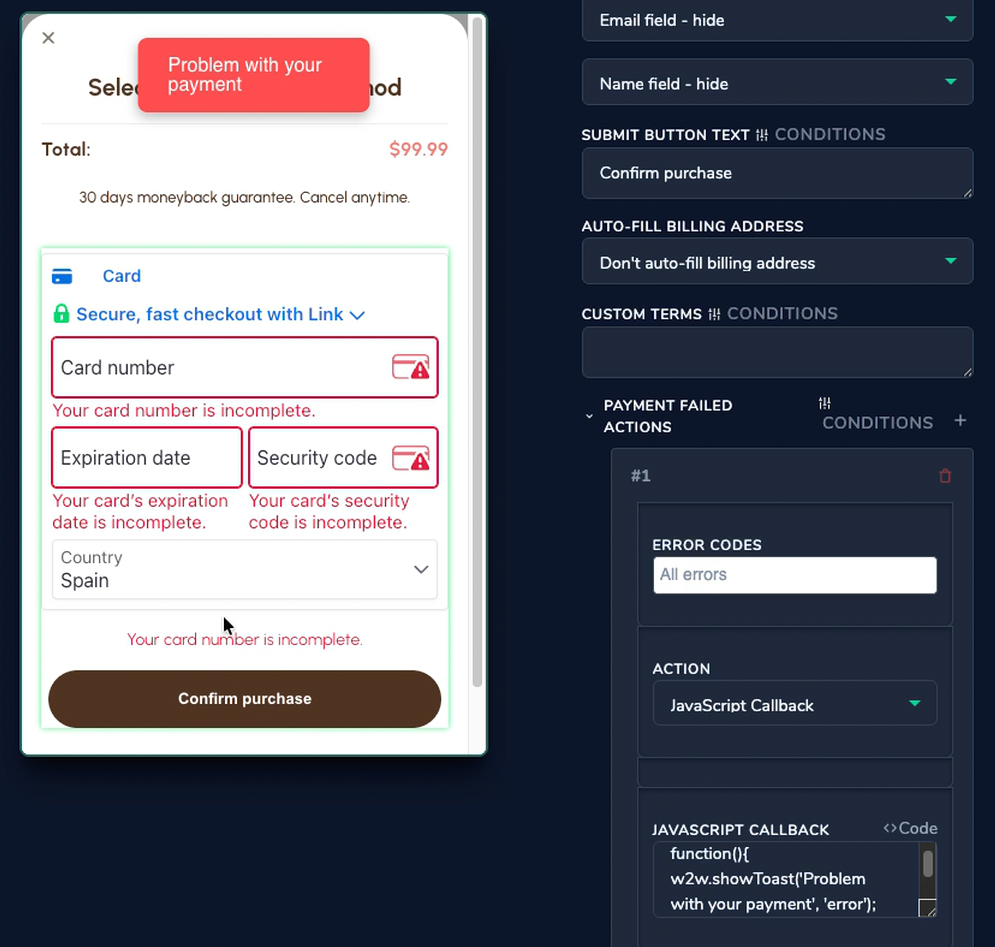
Example 1 - Show an error toast
Displays a red notification banner at the top of the payment popup for any payment failure.
function(){
  w2w.showToast('Problem with your payment', 'error');
}
Example 2 - Log an event and redirect
Logs an analytics event and redirects the user to a different URL (e.g., an alternative offer page).
function(){
  w2w.logEvent('Purchase', { value: 90 });
  location.href = 'https://your-redirect-url.com/';
}
Part 3B. Open Popup - Set Up a Dedicated Error Screen
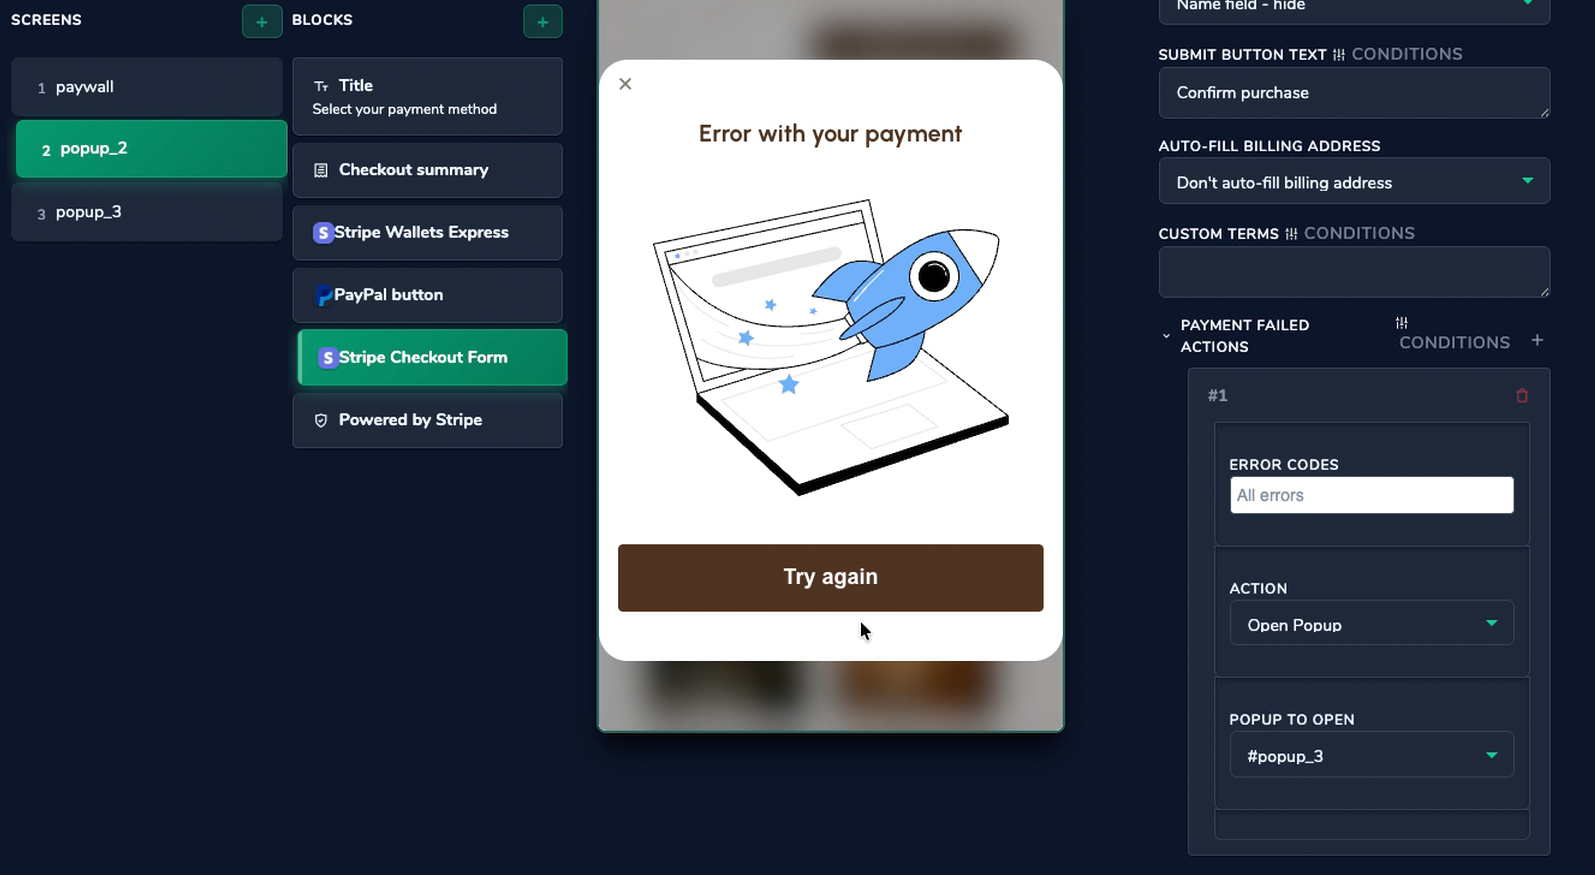
Instead of a JS callback, you can redirect the user to a dedicated error popup. Select Open Popup in the Action dropdown and choose the target screen from the Popup to Open dropdown.
Example 3 - How to build a dedicated error screen
- Create a new popup screen: In the Screens panel, click + and name it (e.g.,
popup_3). - Add a Title block: Set the content to:
Error with your payment. - (Optional) Add an Image block: Include an illustration of your choice.
- Add a Button to Pay block: Label it
Try again. - Configure the button: In the Block Properties, set On Pay Button Click → Open Popup #popup_2 to send the user back to the payment form.
Check out this collection of utility methods for managing user interface interactions, analytics, navigation, and conditional logic in web applications.