
Connect a project to ChargebackHit and monitor chargeback events, statuses, and amounts in the Chargebacks dashboard.
Chargebacks in web2wave has two screens, both named Chargebacks:
| Where | What it is for |
|---|---|
| Chargebacks tab inside a project | Setup — merchant information and the ChargebackHit API credentials for that project. |
Chargebacks in the left sidebar (/cabinet/chargebacks) | Dashboard — chargeback events across your projects, with stats, filters, and details for each event. |
Both screens run on the same integration: web2wave receives chargeback and prevention alert data from ChargebackHit for the merchant account you enroll. The dashboard is reporting only — you view and filter events there, you don't resolve them from it.
The full setup, start to finish:
- Request MID, BIN, and CAID for your merchant account from your payment provider — see Get MID, BIN, and CAID from Stripe.
- web2wave creates your ChargebackHit account and sends you the API credentials.
- Fill in the Chargebacks tab in your project and save it — see Set up Chargebacks in your project.
- Open Chargebacks in the sidebar to follow events as they arrive — see Track chargebacks in the dashboard.
Set up Chargebacks in your project
Open your project and go to the Chargebacks tab. Until the integration is filled in, the tab shows a Getting started with ChargebackHit block that summarizes the same steps as this page.
Merchant Information
These fields identify the merchant account whose transactions ChargebackHit monitors. Your payment provider — or its support team — is the source for all of them.
| Field | What to enter |
|---|---|
| MID | Merchant ID of the account that processes your payments. |
| BIN | Bank Identification Number of your acquirer. |
| CAID | Card Acceptor ID for the same merchant account. |
| Statement Descriptor | The descriptor your customers see on their card statement. |
| Shortened Descriptor | The short form of that descriptor, for statements that cut the full one off. |
On Stripe, the descriptor is in Settings → Business details → Public descriptor, and BIN/CAID come from Stripe support — the next section covers how to ask for them.
ChargebackHit API Credentials
Public Key and Secret Key belong to your ChargebackHit account. web2wave creates that account and passes the keys to you — you don't generate them yourself. Paste both into the tab.
The tab also shows a webhook URL. It is read-only and needs no configuration: it is the address ChargebackHit sends events to. Copy it only if support asks you for it.
Click Save once the merchant fields and both keys are filled in. Saved credentials are what switches the Chargebacks dashboard on for this project.
Get MID, BIN, and CAID from Stripe
-
Ask Stripe support for BIN/CAID
To request BIN/CAID from Stripe support for prevention alerts, open a ticket with Stripe support or your point of contact.
In your message, specify that you need BIN/CAID, for example:
Hello Stripe Support Team, We are integrating with the prevention alerts provider and need to obtain the MID, BIN and CAID associated with our merchant account. Could you please confirm how we can access these parameters or provide them for our account? Thank youThey may also ask why you need it.
Just reply that it’s for a third-party integration, and that you do not store API keys — you only connect to the platformSubmit the request and wait for the answer.
Stripe support may either provide the BIN/CAID details directly or guide you to your acquiring bank if the data is not available.
Payment descriptor (MID) you can get here:
To find the payment descriptor in Stripe, log in to your Stripe account and navigate to Settings > Business details > Public descriptor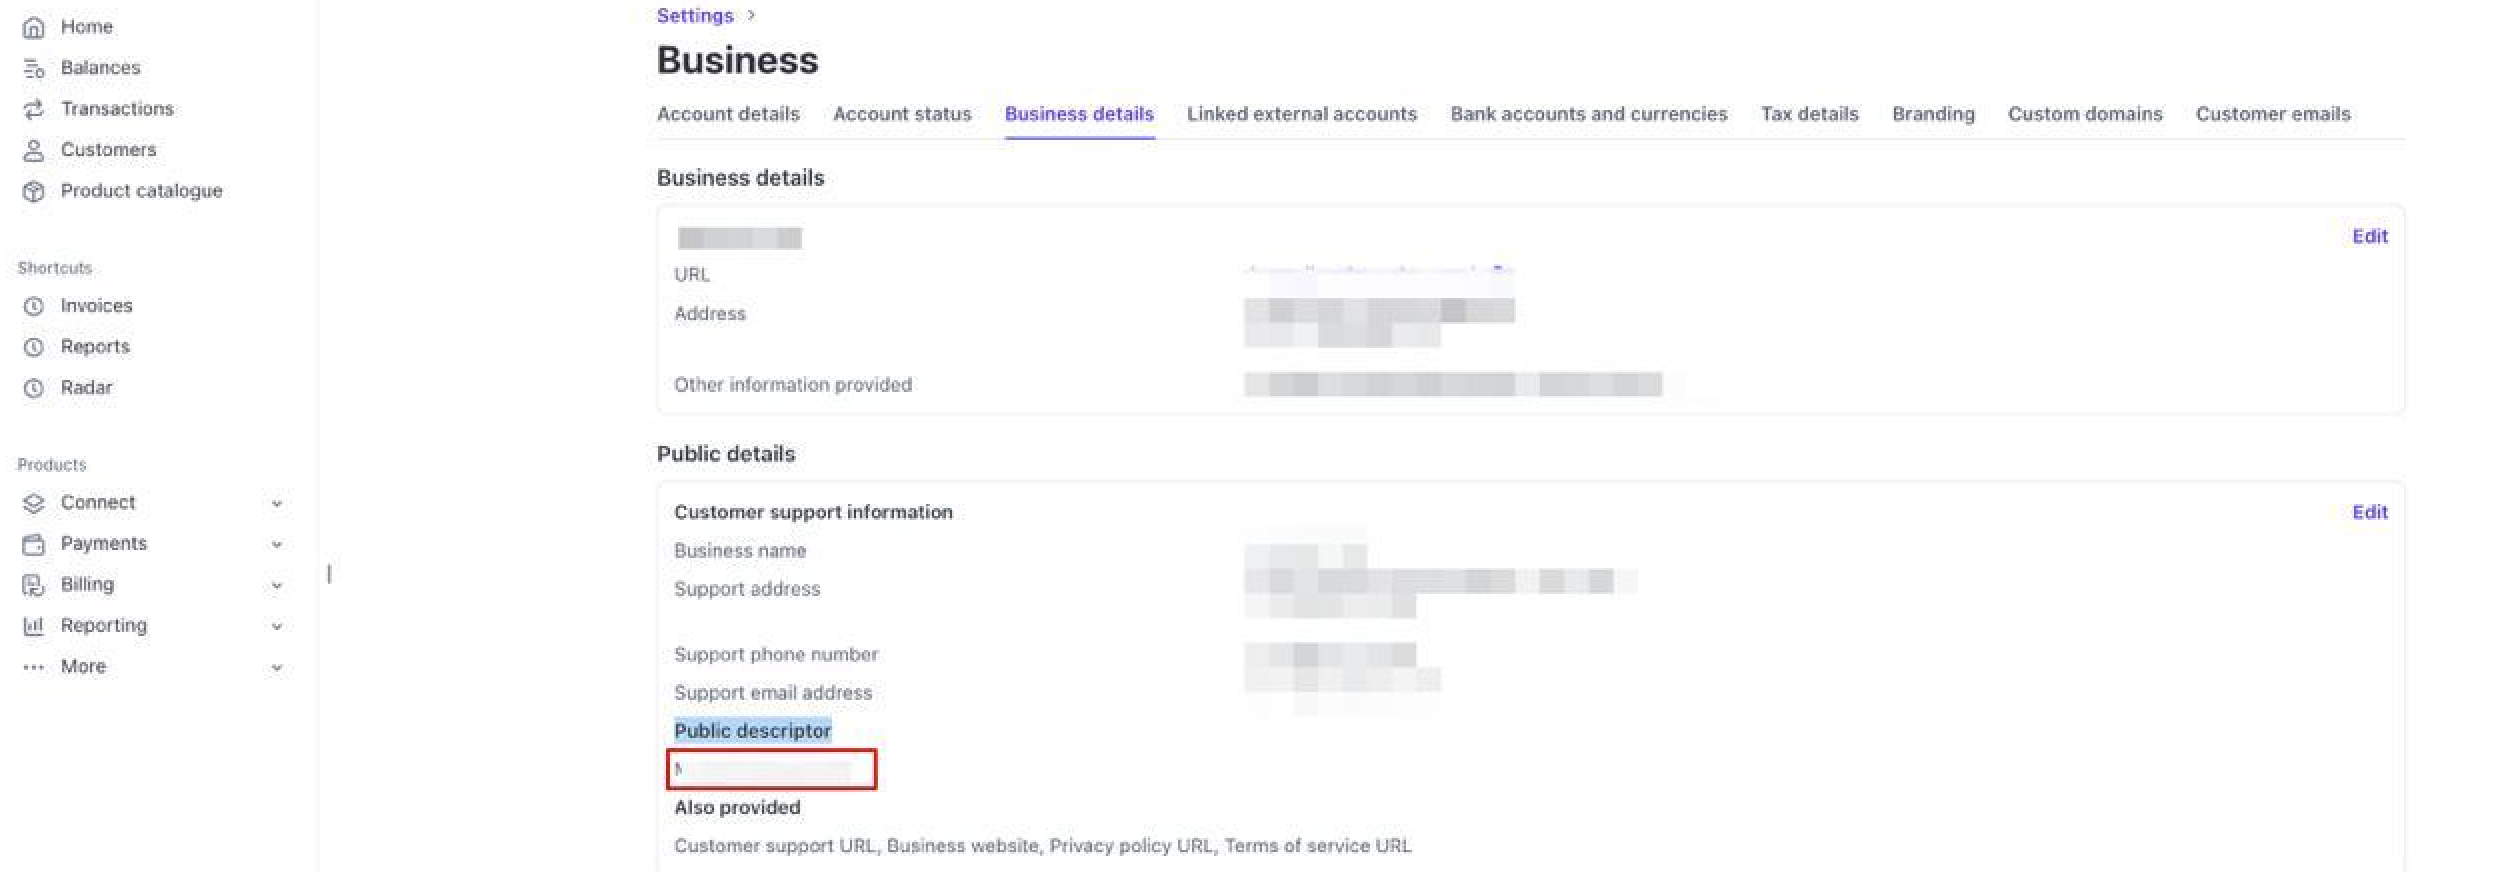
-
We will create account and share accounts details with you
-
Сonnect Stripe with secret key
Integration -> Stripe -> Connect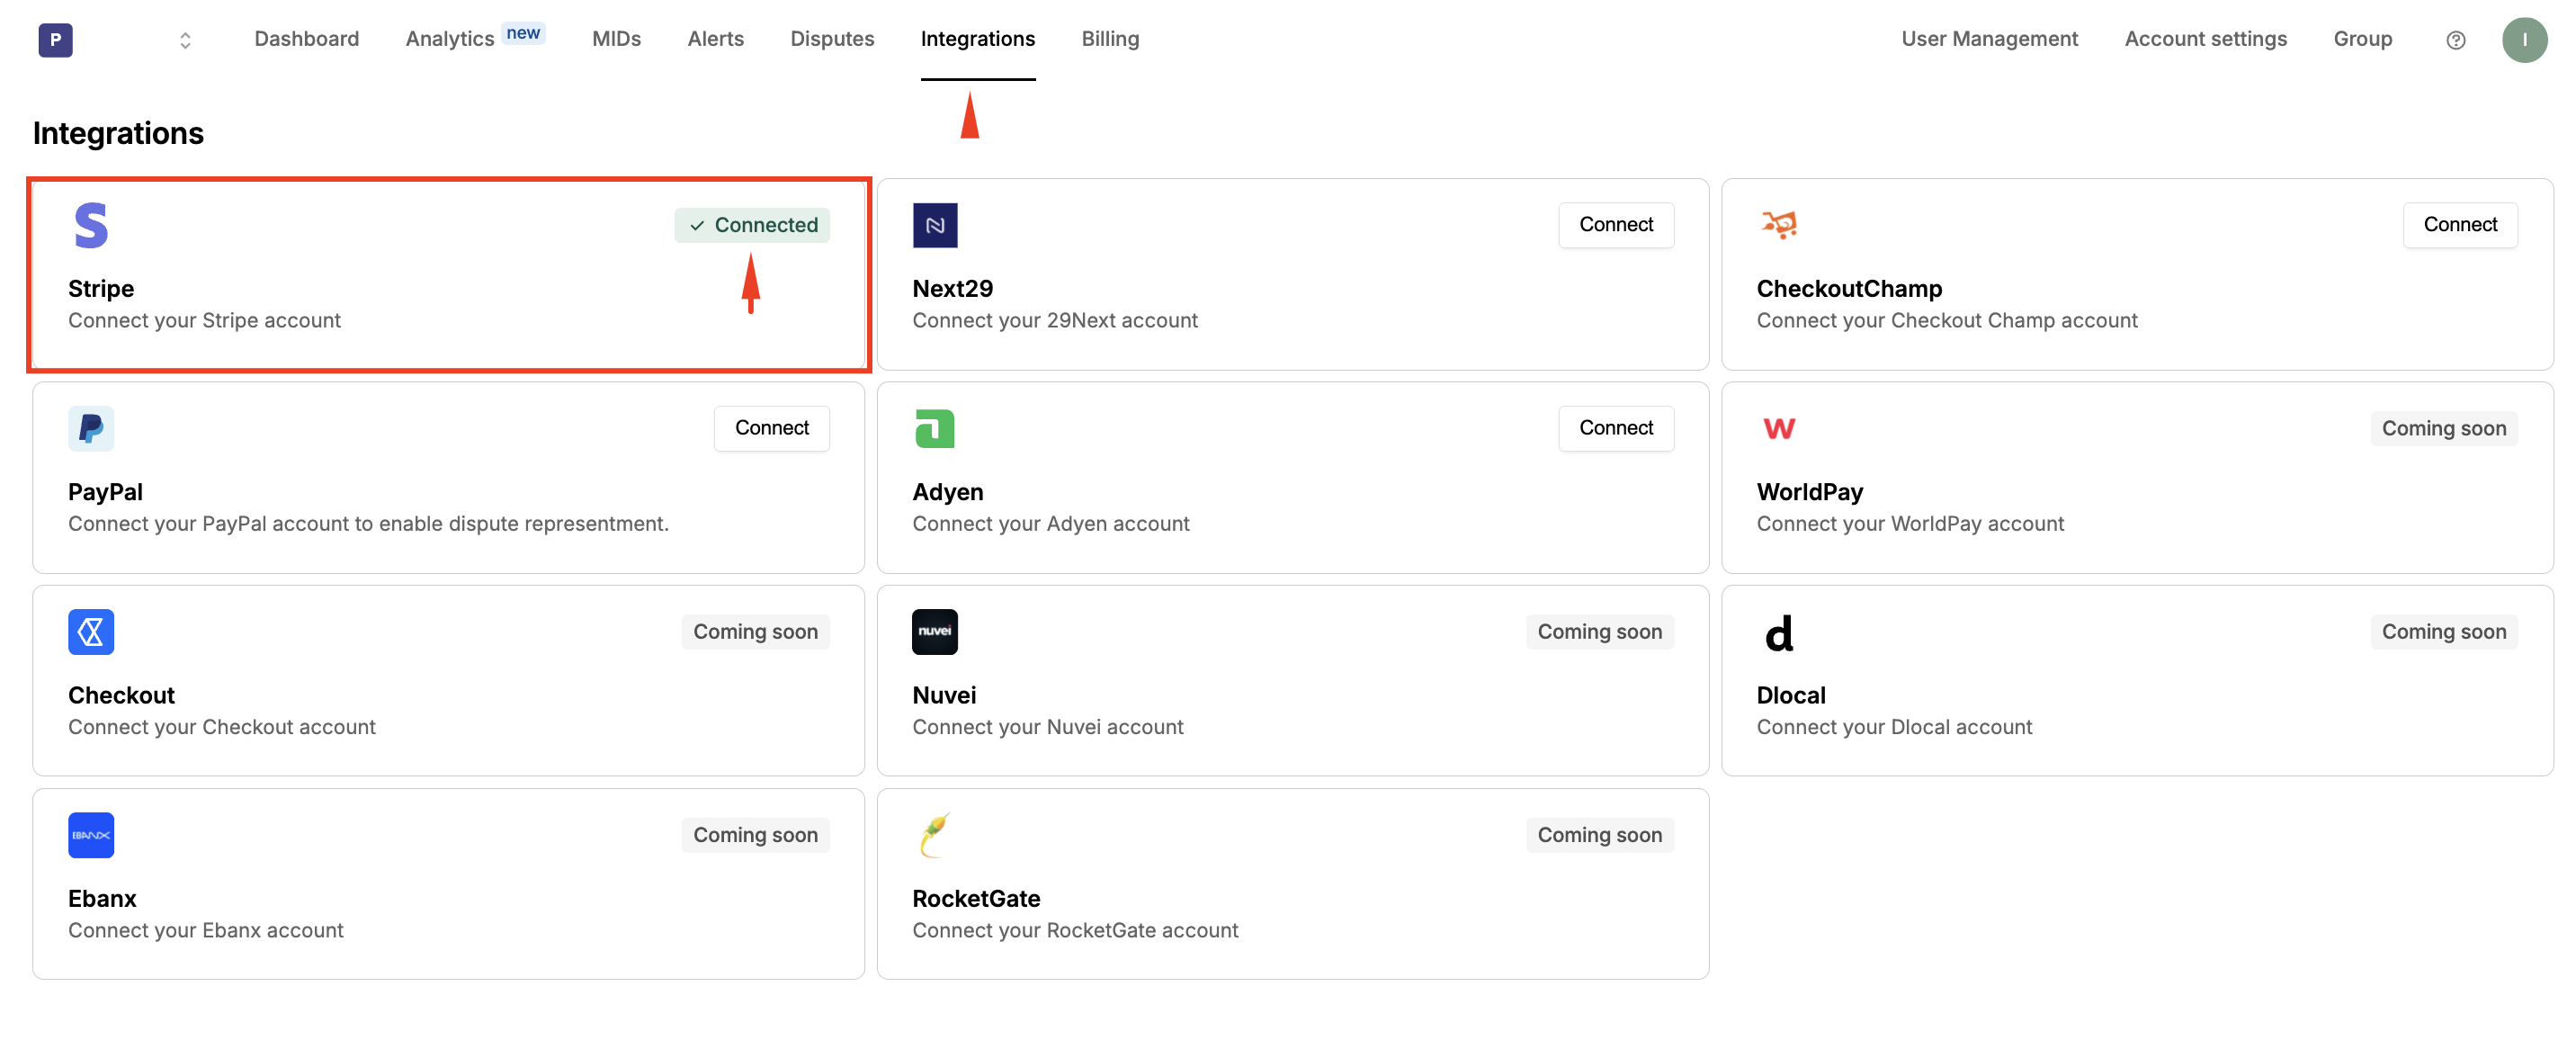
- Create Secret Key in Stripe and add it below
Log in to your Stripe dashboard.
Navigate to Developers > API keys.
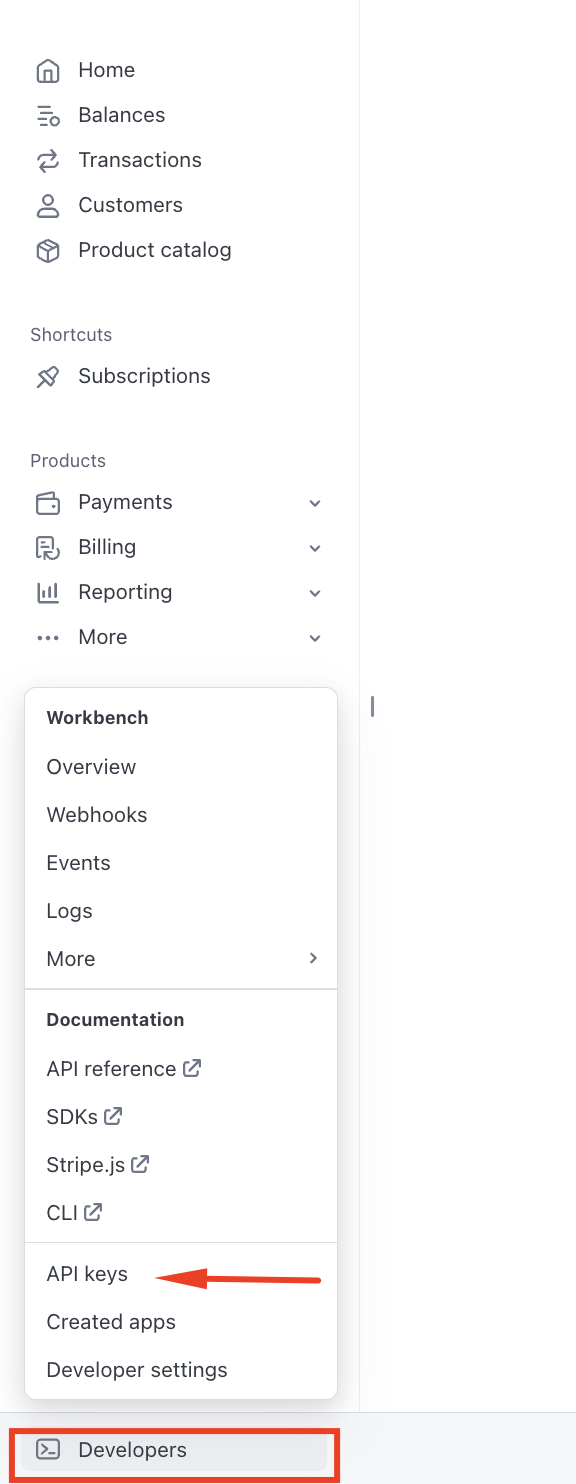
- Click on Create restricted key.
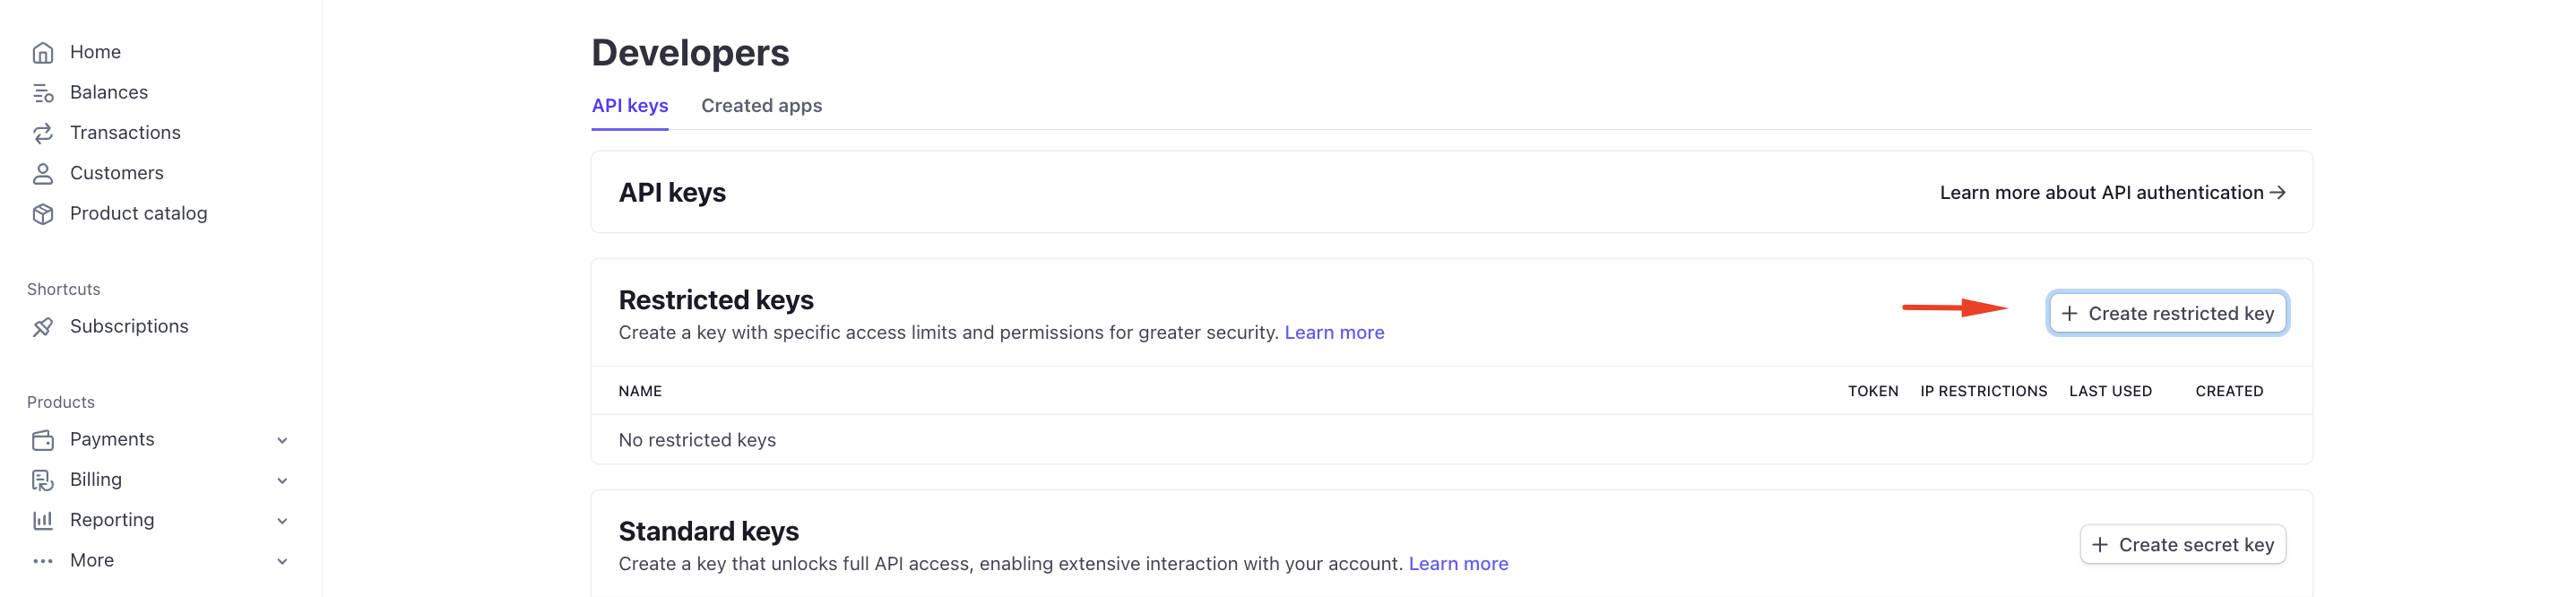
Select Building your own integration.
- Set the following permissions:
Disputes: write (Core + Issuing)
Invoices: read
Radar (Reviews): read
Charges and refunds: write
Subscriptions: write
Files: write
Webhook: write
Payment intents: read
Customers: read
- Save your newly generated key
- Place the key here, select both toggles submit
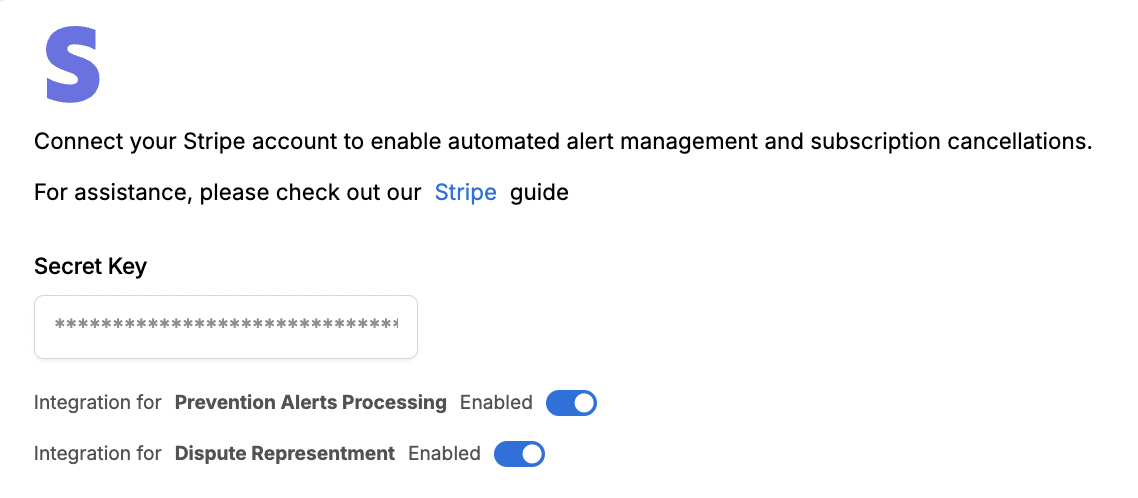
- In the ChargebackHit dashboard, go to Add MID
Choose next:
Resolve: RDR/CDRN/Ethoca
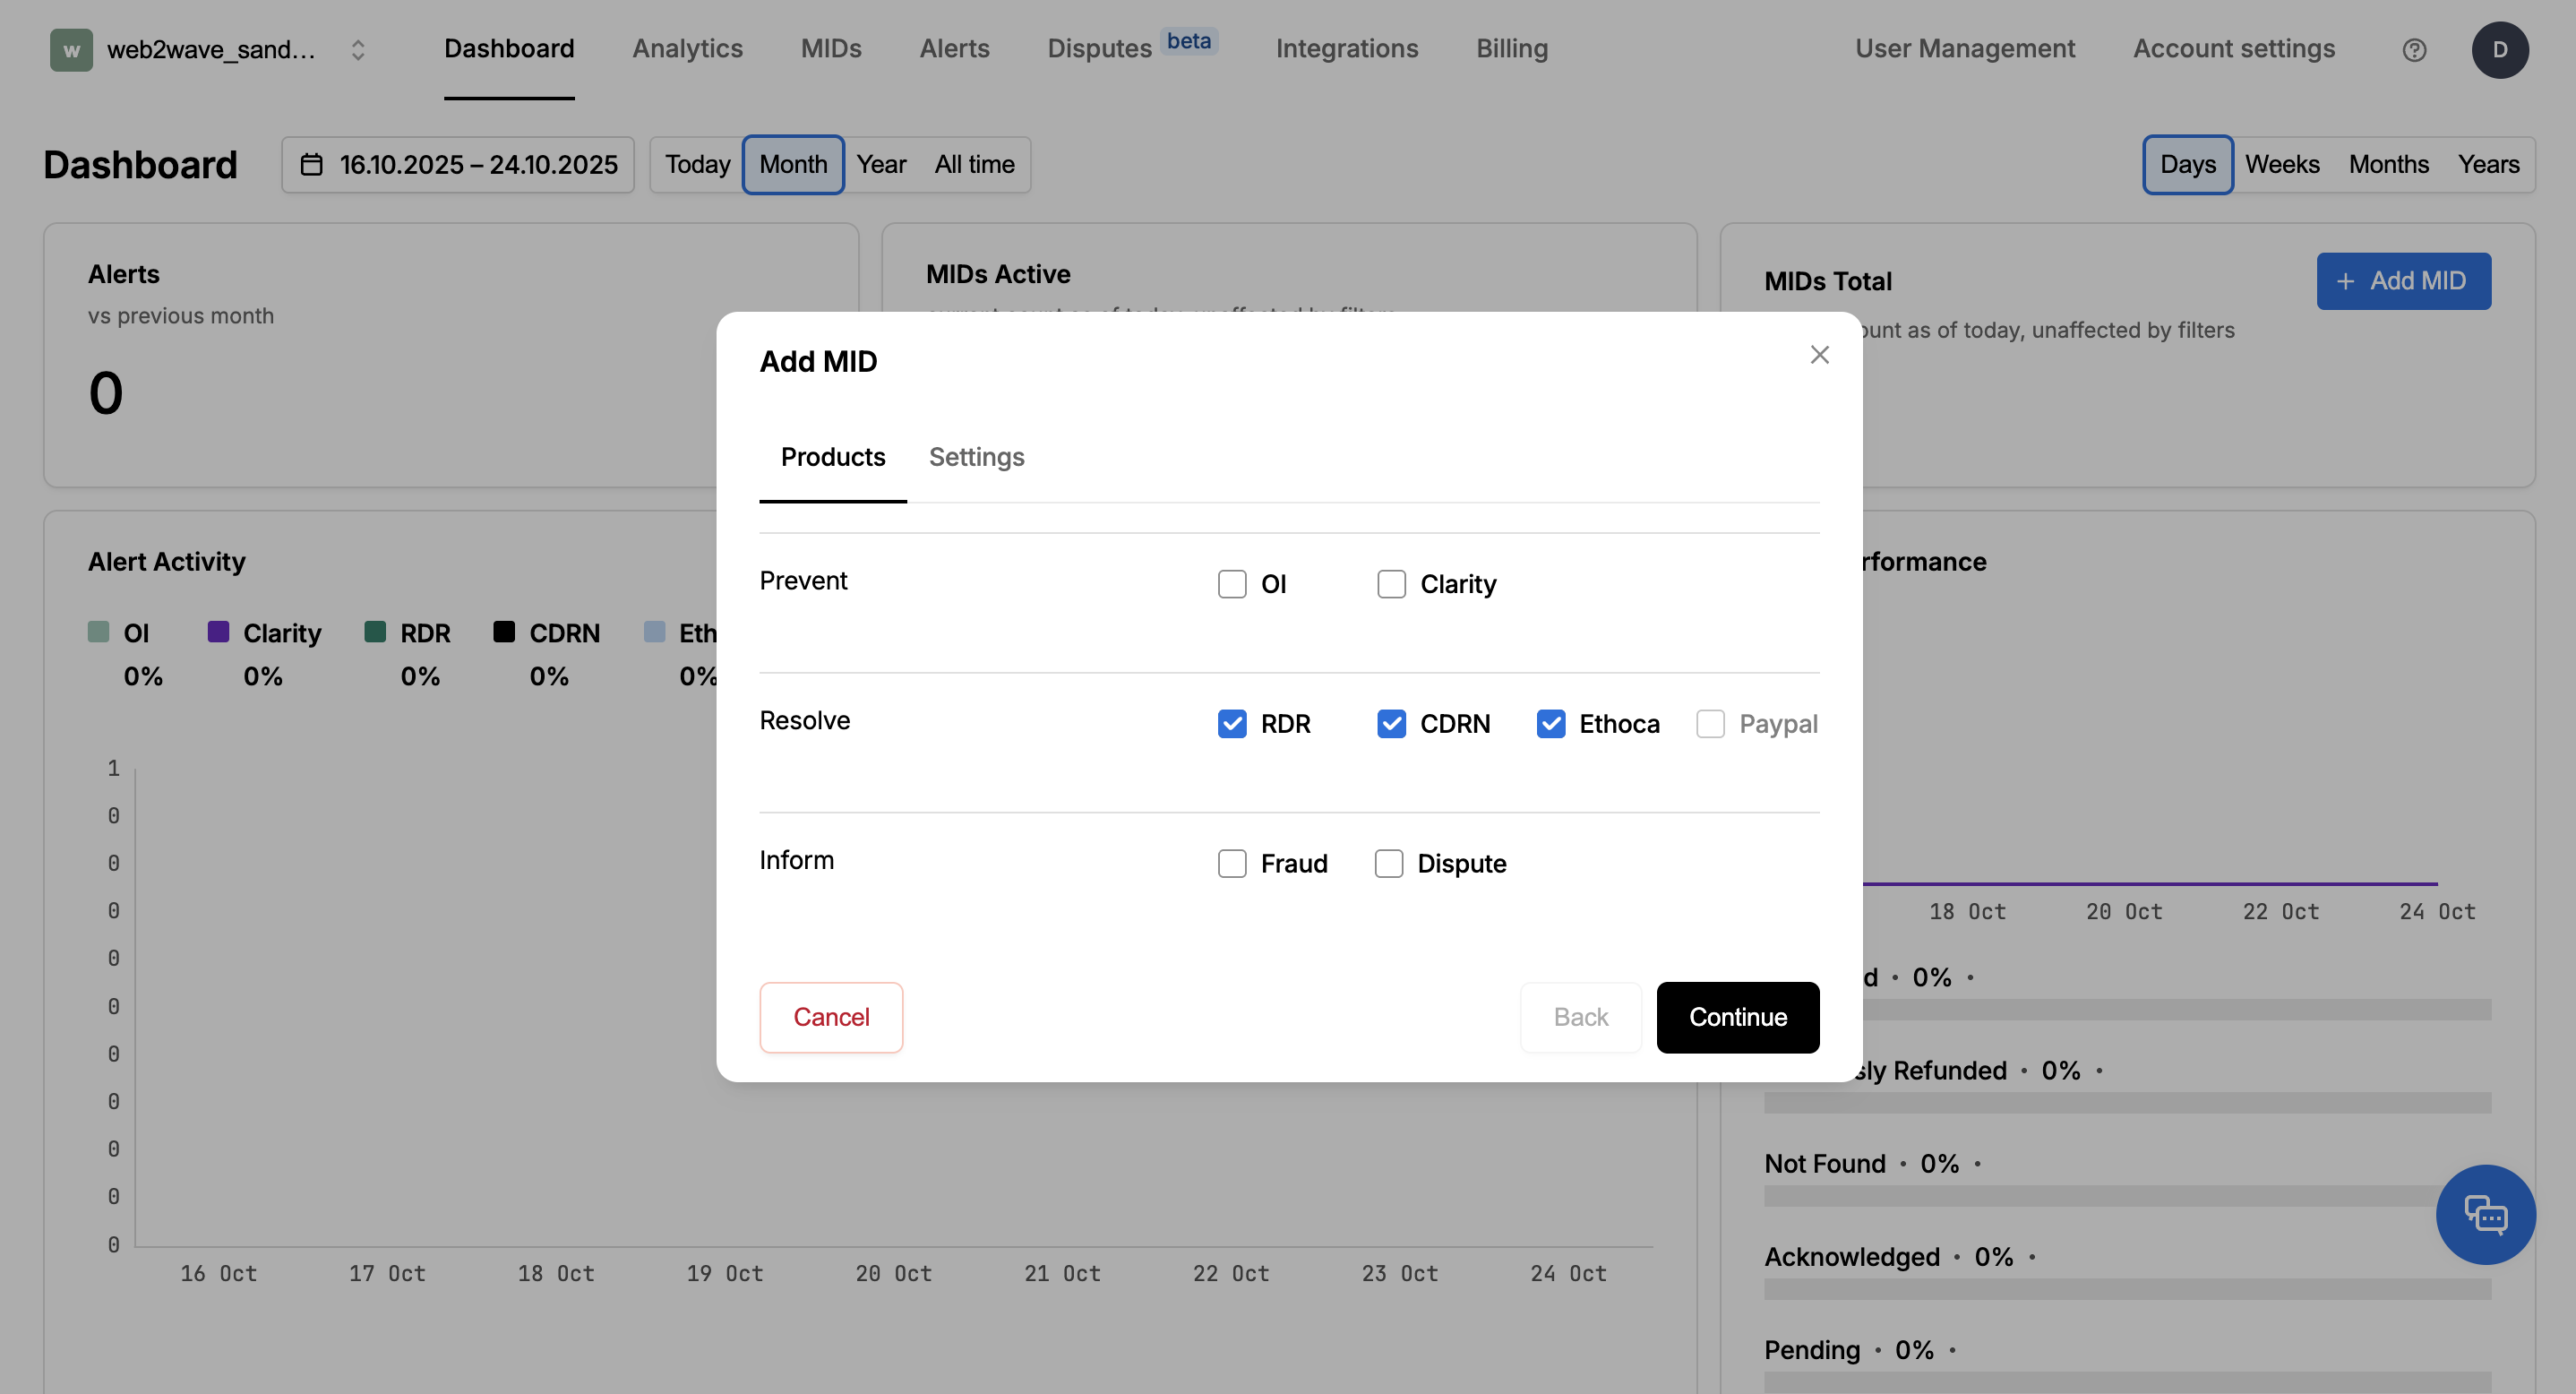
- Fill it with information from the Stripe support:
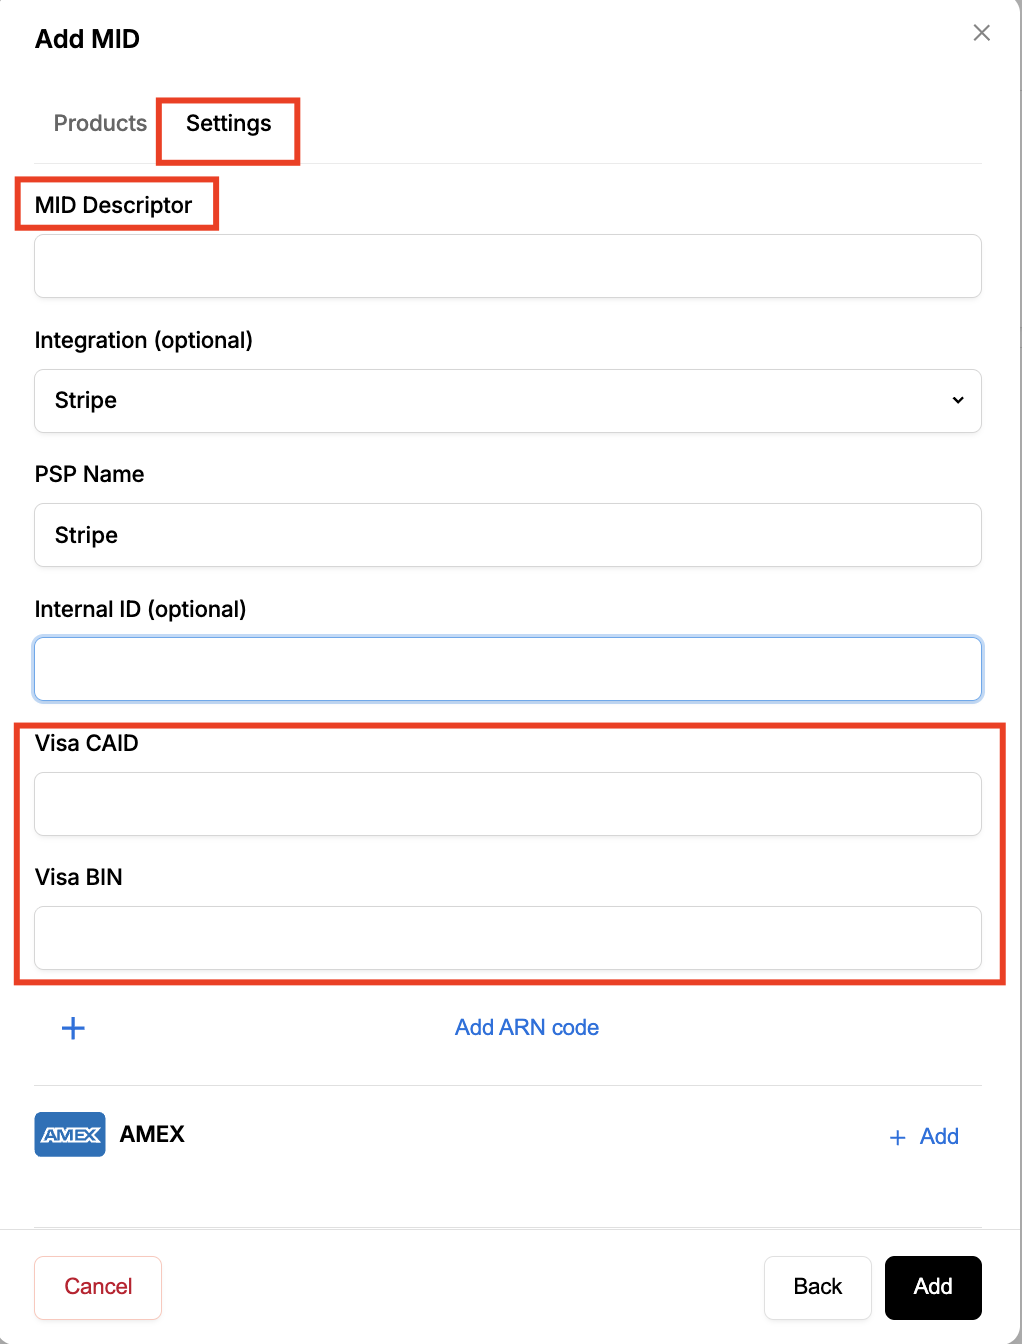
- In case where stripe rejected your request of MID/CAID/BIN
You may fill ARNs on the Stripe side
Go to Stripe > Transactions > Refunds.
Apply the following filters:
Date: Last 120 days
Card brand: Visa
Refunded: At least 3 days ago
Select the needed transaction.
Find the ARN in the Payment breakdown section (20 symbols)
- Wait for review from ChargebackHit and ready for launch
Enrolling a PayPal MID takes a different set of parameters — see PayPal integration.
Track chargebacks in the dashboard
Open Chargebacks in the left sidebar (/cabinet/chargebacks).
Before any project is connected, the page shows the Fight Chargebacks Automatically landing with a Configure Chargebacks button. That button opens the Chargebacks tab of your project, so you land exactly where the setup above happens.
Once a project has API credentials saved, the page shows your data instead.
Stats
Four cards at the top summarize everything that matches your current filters:
- Total Events — chargeback events web2wave received.
- Pending — events that are still awaiting an outcome.
- Chargebacks — events that ended as chargebacks.
- Total Amount — the total money value of the events in view.
Because the cards follow the filters, they double as a quick report: pick one project and last month to see that project's chargeback volume for the period.
Filters
- Project — a single project or all of them.
- Date range — the period you want to look at.
- Status — where the event stands.
- Type — the kind of event, as reported by ChargebackHit.
Event list and Chargeback Details
Below the filters, events are listed in a table. Select a row to open Chargeback Details, which shows everything web2wave received for that event — identifiers, amount, status and type, and the dates.
From the details you can open the invoices of the related subscription, which is the fastest way to match an alert to the exact payment and customer.
What this screen does and doesn't do
The dashboard is read-only. You can filter, open, and read events — there are no dispute or refund buttons on it. Two things to keep in mind:
- Resolution of alerts happens on the ChargebackHit side, through the options selected when your MID was enrolled (RDR/CDRN/Ethoca).
- If you need to refund the payment or cancel the subscription behind an event, do it from the subscription itself — see Refunds and subscription cancellations.
If the dashboard looks empty
- You still see the "Fight Chargebacks Automatically" landing. No project has both API keys saved yet, or they were not saved successfully — reopen the project's Chargebacks tab and check the Public Key and Secret Key fields.
- The page loads but the table has no rows. Widen the date range and set Project to the connected project. Events only start arriving after ChargebackHit finishes reviewing your MID (step 12 above), so a freshly enrolled merchant account will be empty for a while.